Fixing the GD77's terrible charger
The GD77 charging base electronics is trash; a TP5100 is a trivial and cheap replacement.

The GD77 is a great radio, especially paired with OpenGD77 firmware, but the charger it comes with is pretty terrible. By far the worst thing about it is that it ships with a wall outlet that has a USB-A jack but provides 12V of power. So if you ever mix that plug up with a normal one, you are going to destroy whatever you plug it into. It also takes 15-20 hours to charge, some folks report that the charge level varies from undercharging to overcharging (sometimes significantly, I've heard as high as 8.6V!), and I've also heard of them simply flat-out failing. There are a lot of folks that just replace the whole guts with a TP5100 module and wire it into 12V. I would highly suggest that if you use one of these charging docks and have any knowledge of electronics and basic soldering skills, to do this modification, it's very easy. And once it's done, toss that insane 12V USB wall adapter before you accidentally use it.
The TP5100 charger will charge the devices to the correct voltage for Lithium-Ion batteries. It charges them at a very safe speed, but a much faster speed than the original charger (60 to 90 minutes from dead, varies on battery size, etc), and is a better-designed board, and I have yet to hear of one failing.
Bonus points: this charging base isn't just used on the GD77; I know that it also works perfectly fine on the Anytone 868/878, MD380, and possibly other radios. It needs a very slight modification to work on the Anytone radios that can be done in seconds with a pair of side cutters just the battery retention rails on the side are just a tad too tall for the Anytone battery.
I've also heard that the Anytone 868/878 charger is known to fail and stop charging, so this modification is also highly suggested for those radios as well.
This was not my idea; the original idea comes from the excellent page written by Jason Reilly, GD77 Mods. He also has a similar page for the Anytone 868/878 page, Anytone 868/878 Mods. There is a lot more on those pages, and you should check them out.
I will leave the detailed instructions to the pages above, as they cover it in great detail but below are a series of pictures showing how I did my modification, which is very slightly different. My modification includes adding a 5.5x2.1mm jack for the DC power input, a 12V switch to turn the charging base on or off as it's permanently attached to my desktop 12V PSU, and I don't use the original board at all (in fact, if I really wanted to, I could easily reverse the modification).
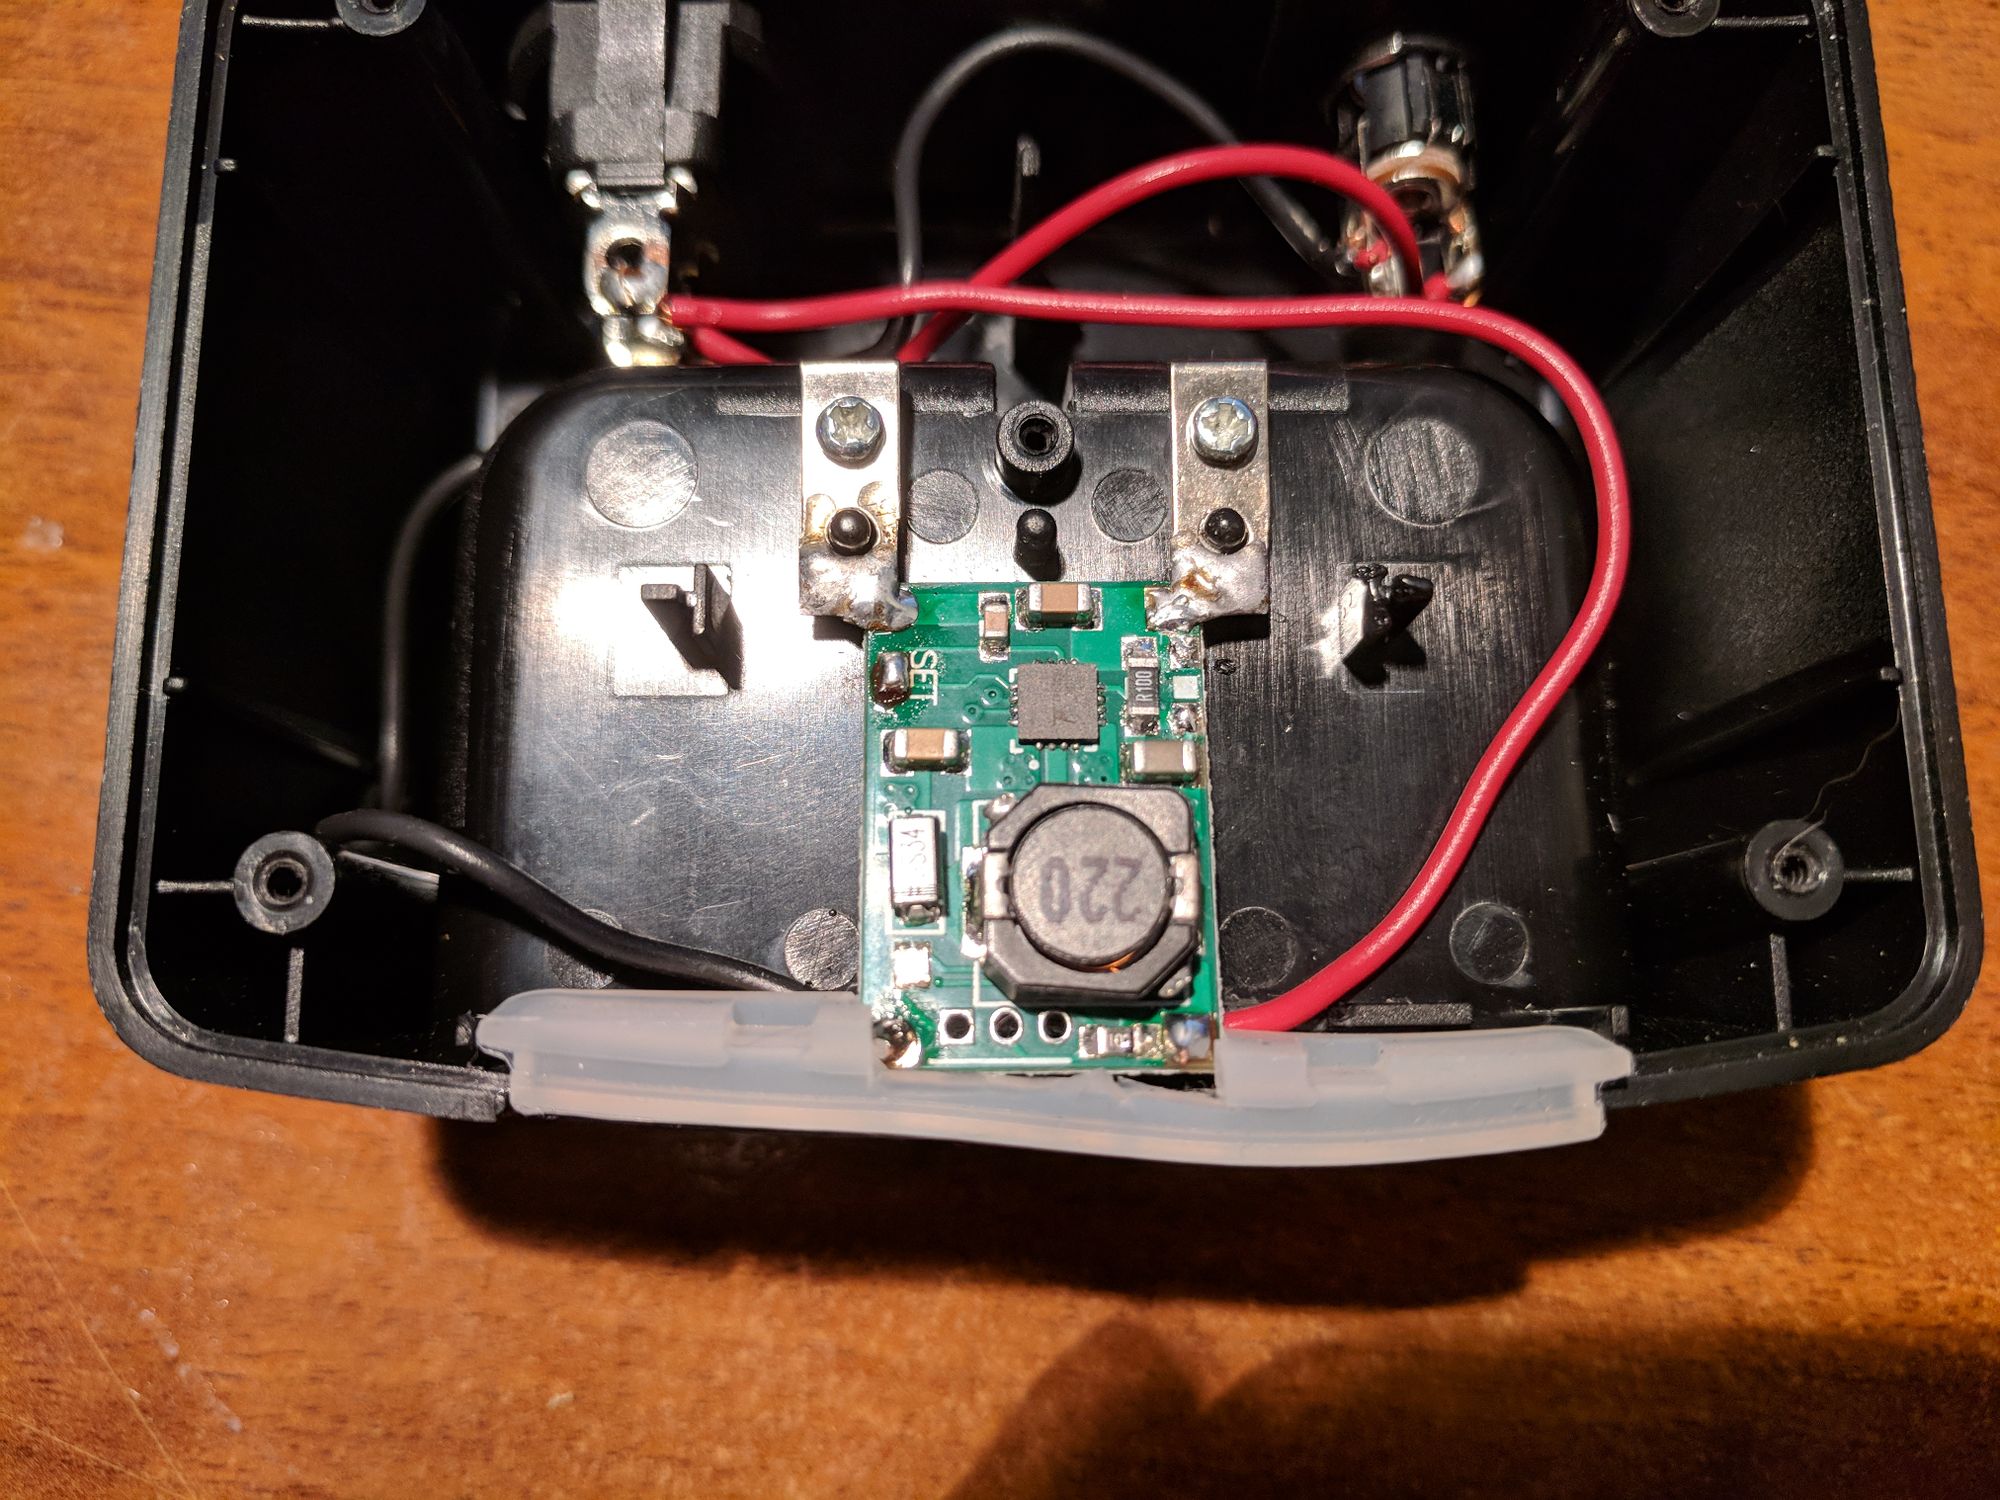
This image shows the TP5100 module from the top down, note that the only electronics remaining is the TP5100 itself, which is soldered directly to the original charger tabs and wired through the switch to the DC input jack. No real notification of the charging base itself is required, and the base still has an idle/charging indication through the opaque window of the original charger. Don't worry about the charging window looking a bit wonky; it is fine when the base is reassembled.
Please do read the Modification pages above for details, but note the top-right of the TP5100 in this image, a resistor has been removed. This reduces the current rate to 1A from the default of 2A, and the location marked SET in the top-left corner has been jumpered to set the charger to 2C, or 8.4V. Both modifications to the TP5100 are required, and both are very easy to do. The board is designed for these modifications so you can customize it to your application.
If you're concerned that 1A is too fast for charging (hint: it is fine), you can adjust the resistor value in the top right to adjust it. You would need a slightly higher value to replace the remaining resistor. Lower value here means higher current, thus the original two resistors in parallel (lower total value) being 2A. It's fine as-is at 1A, but do make sure to remove one of the resistors; 2A is a little too aggressive for these batteries.
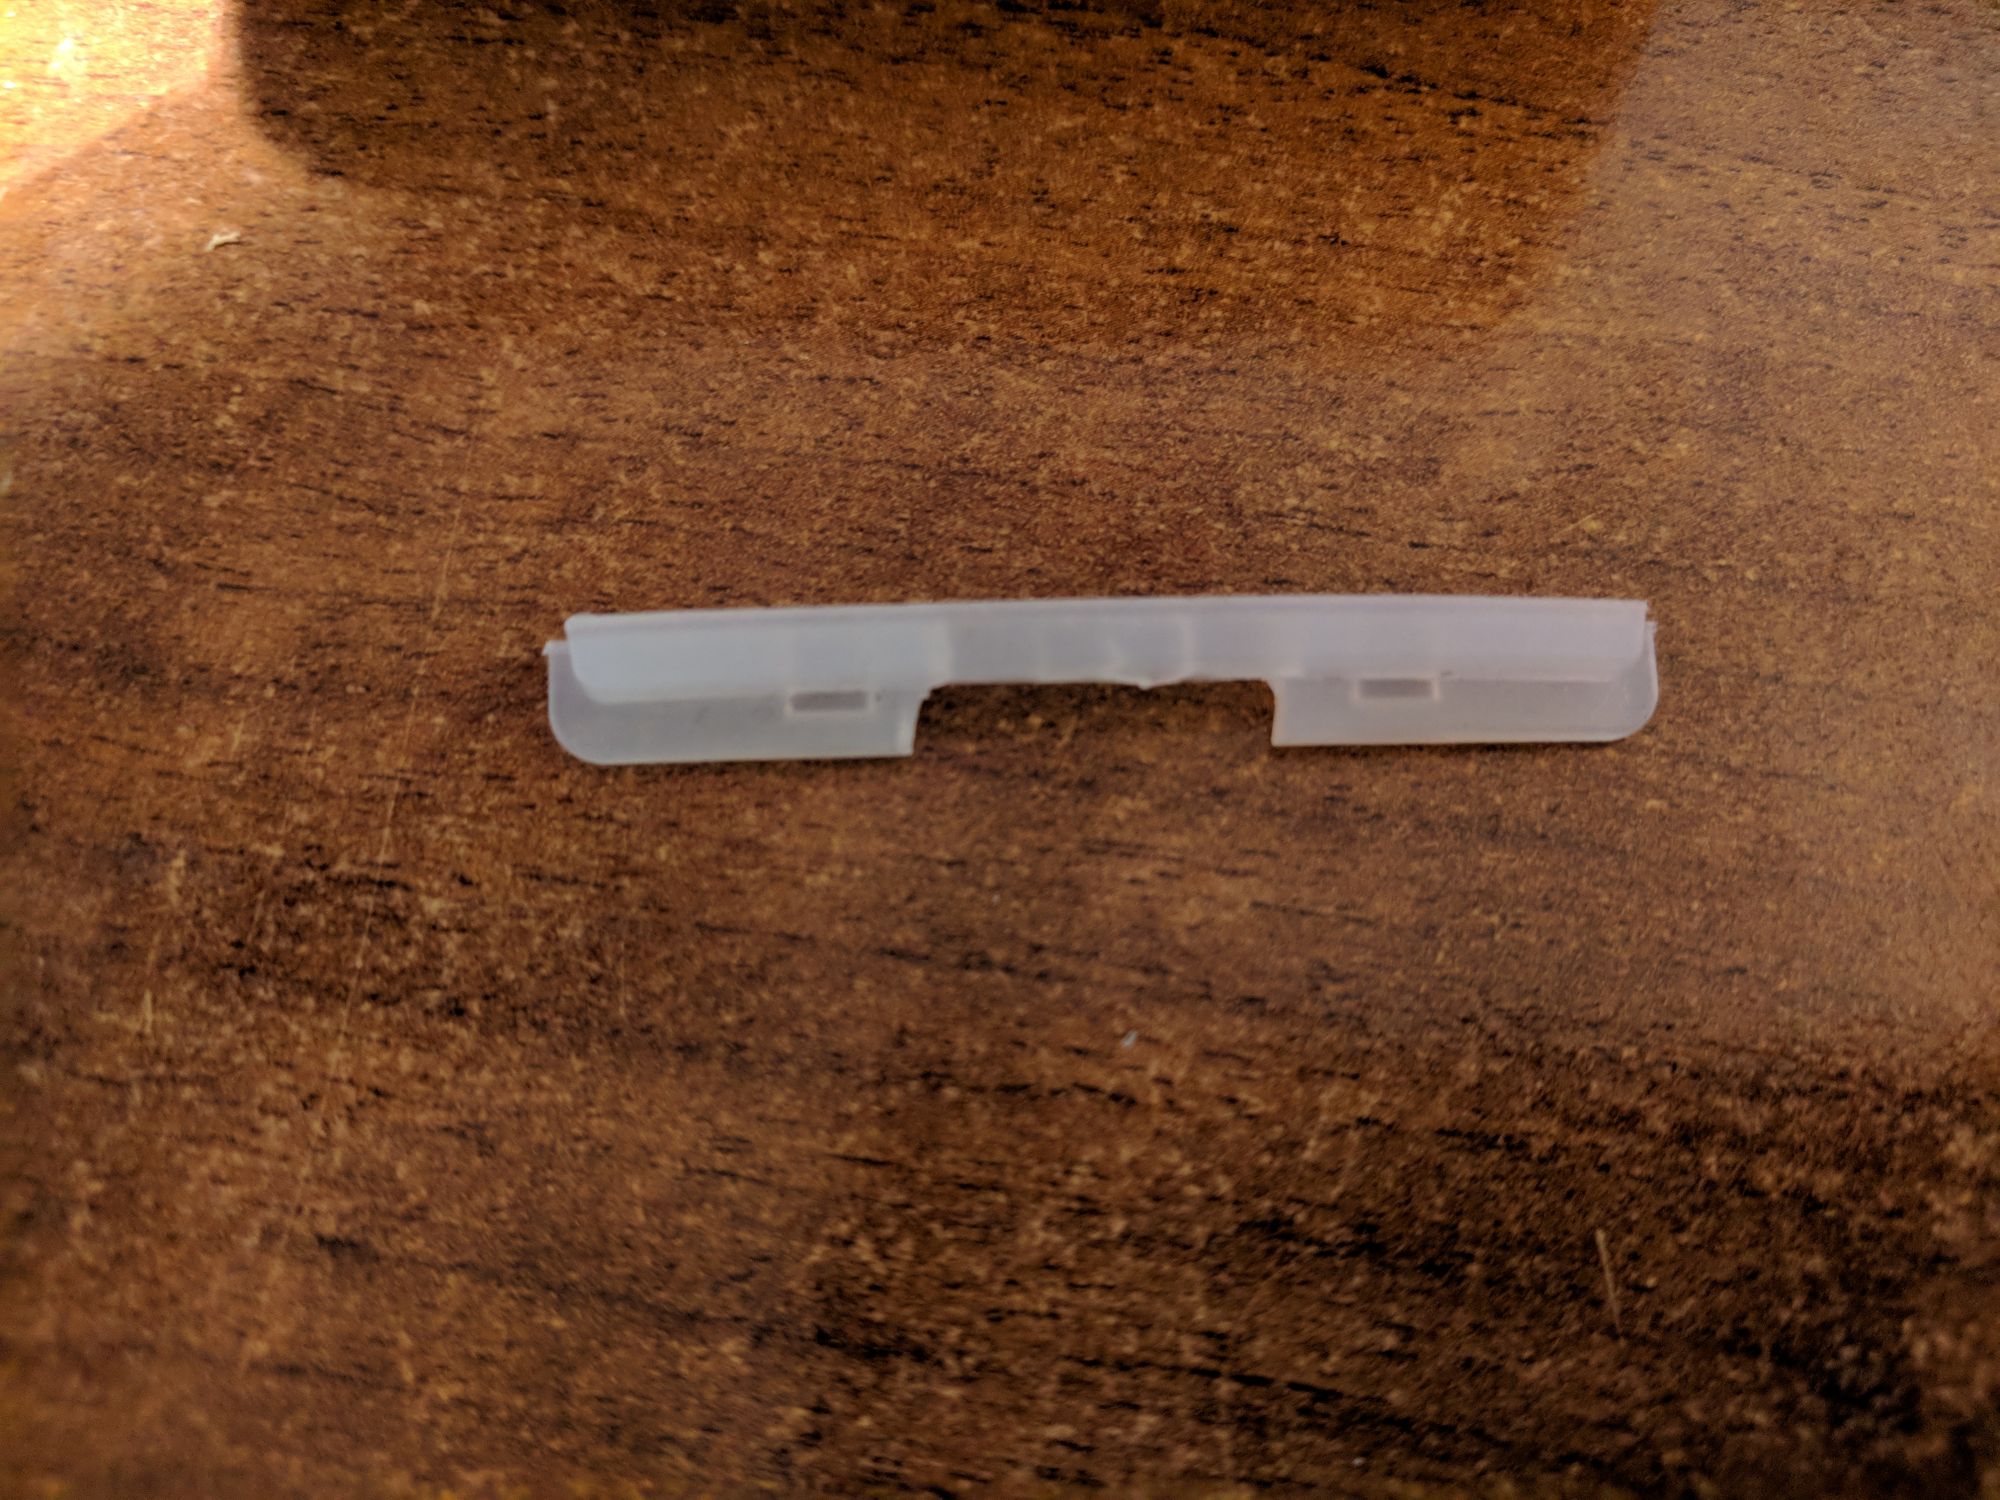
The opaque charging window bit has to be slightly modified to fit, but it was just a matter of trimming it slightly. I don't recall what it looked like originally, but it was just a matter of trimming what didn't fit with the new TP5100 board in place. It still fits and stays in the charging base once it's closed up.

Nothing special here, just the DC jack. The barrel is always negative, the center is always positive! Unless it isn't, always check.
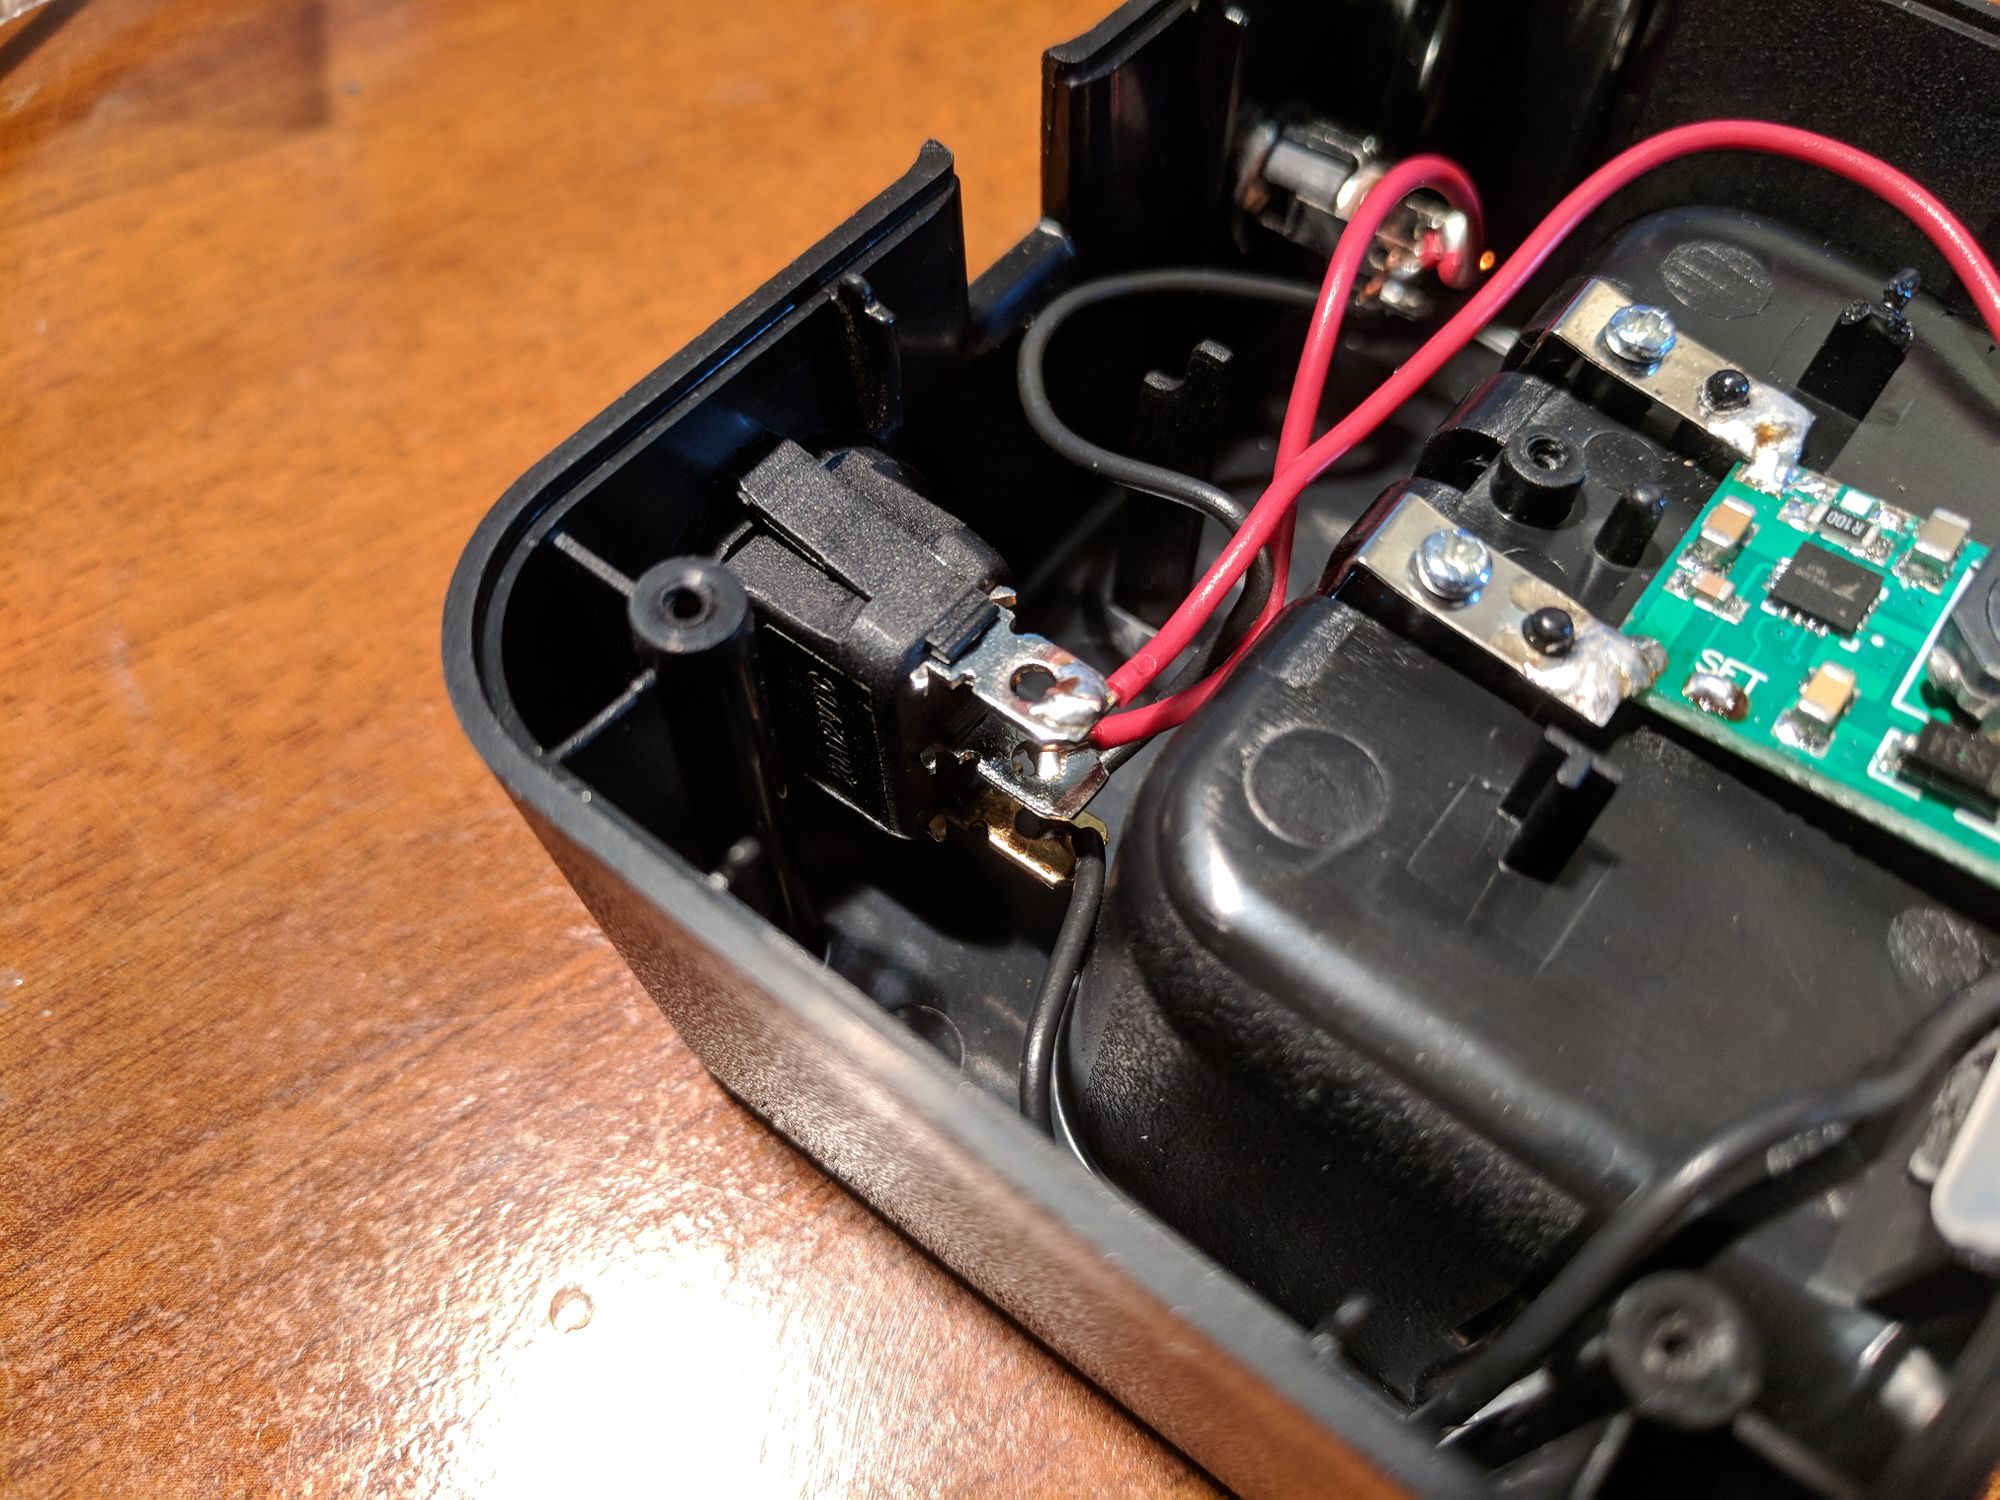
Again, nothing fancy here. The power to the base can be turned off via this 12V DC power switch.
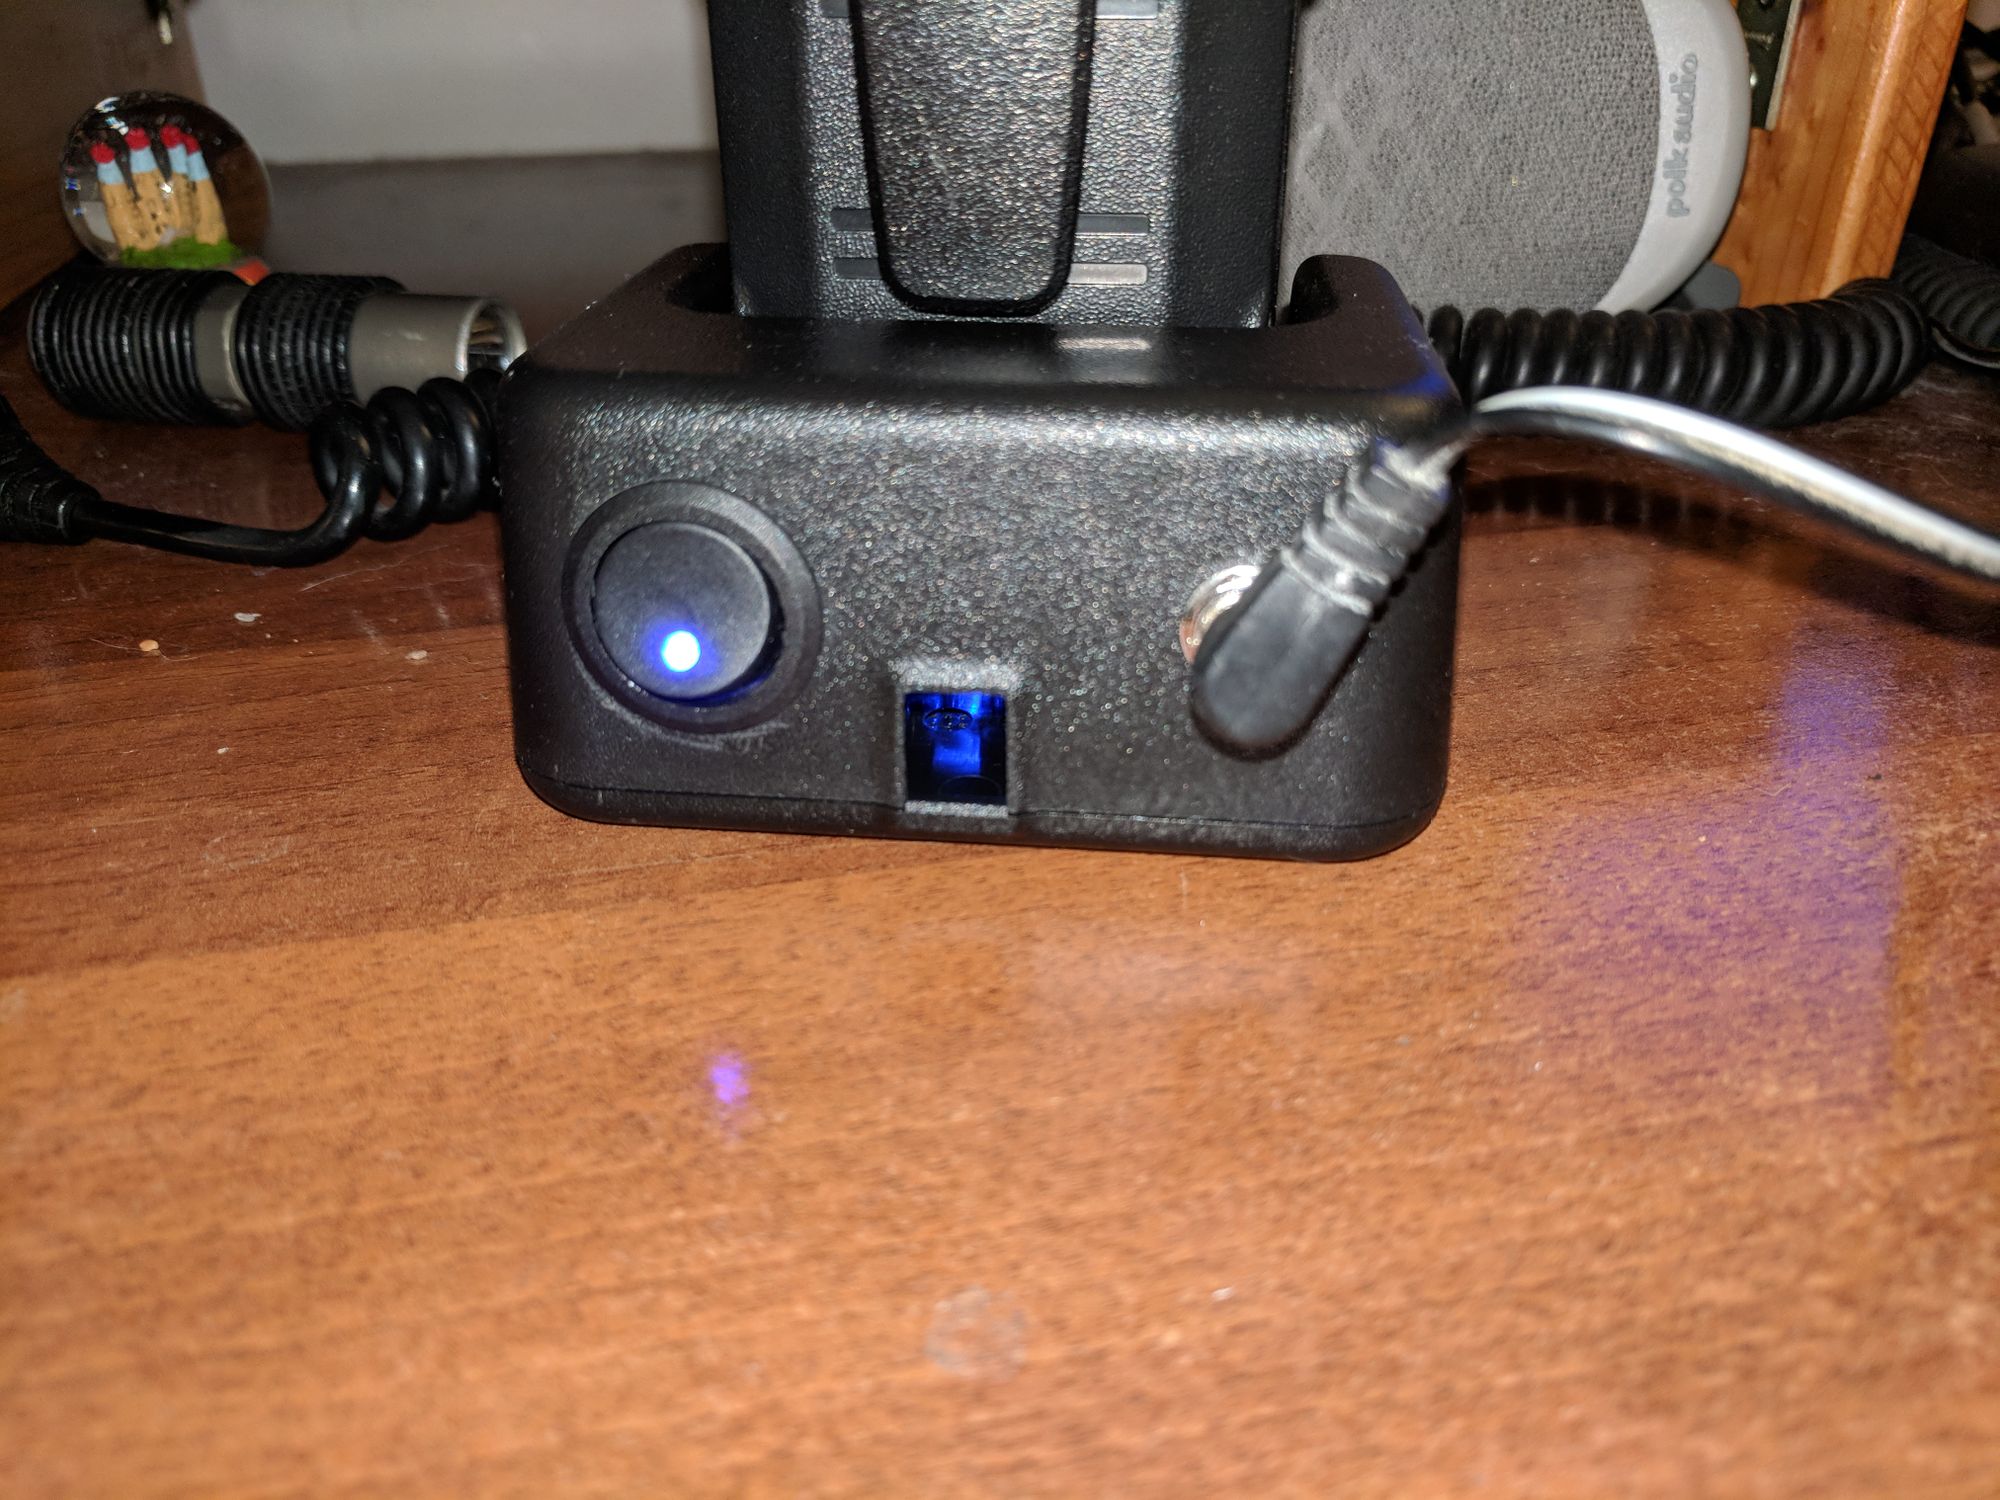
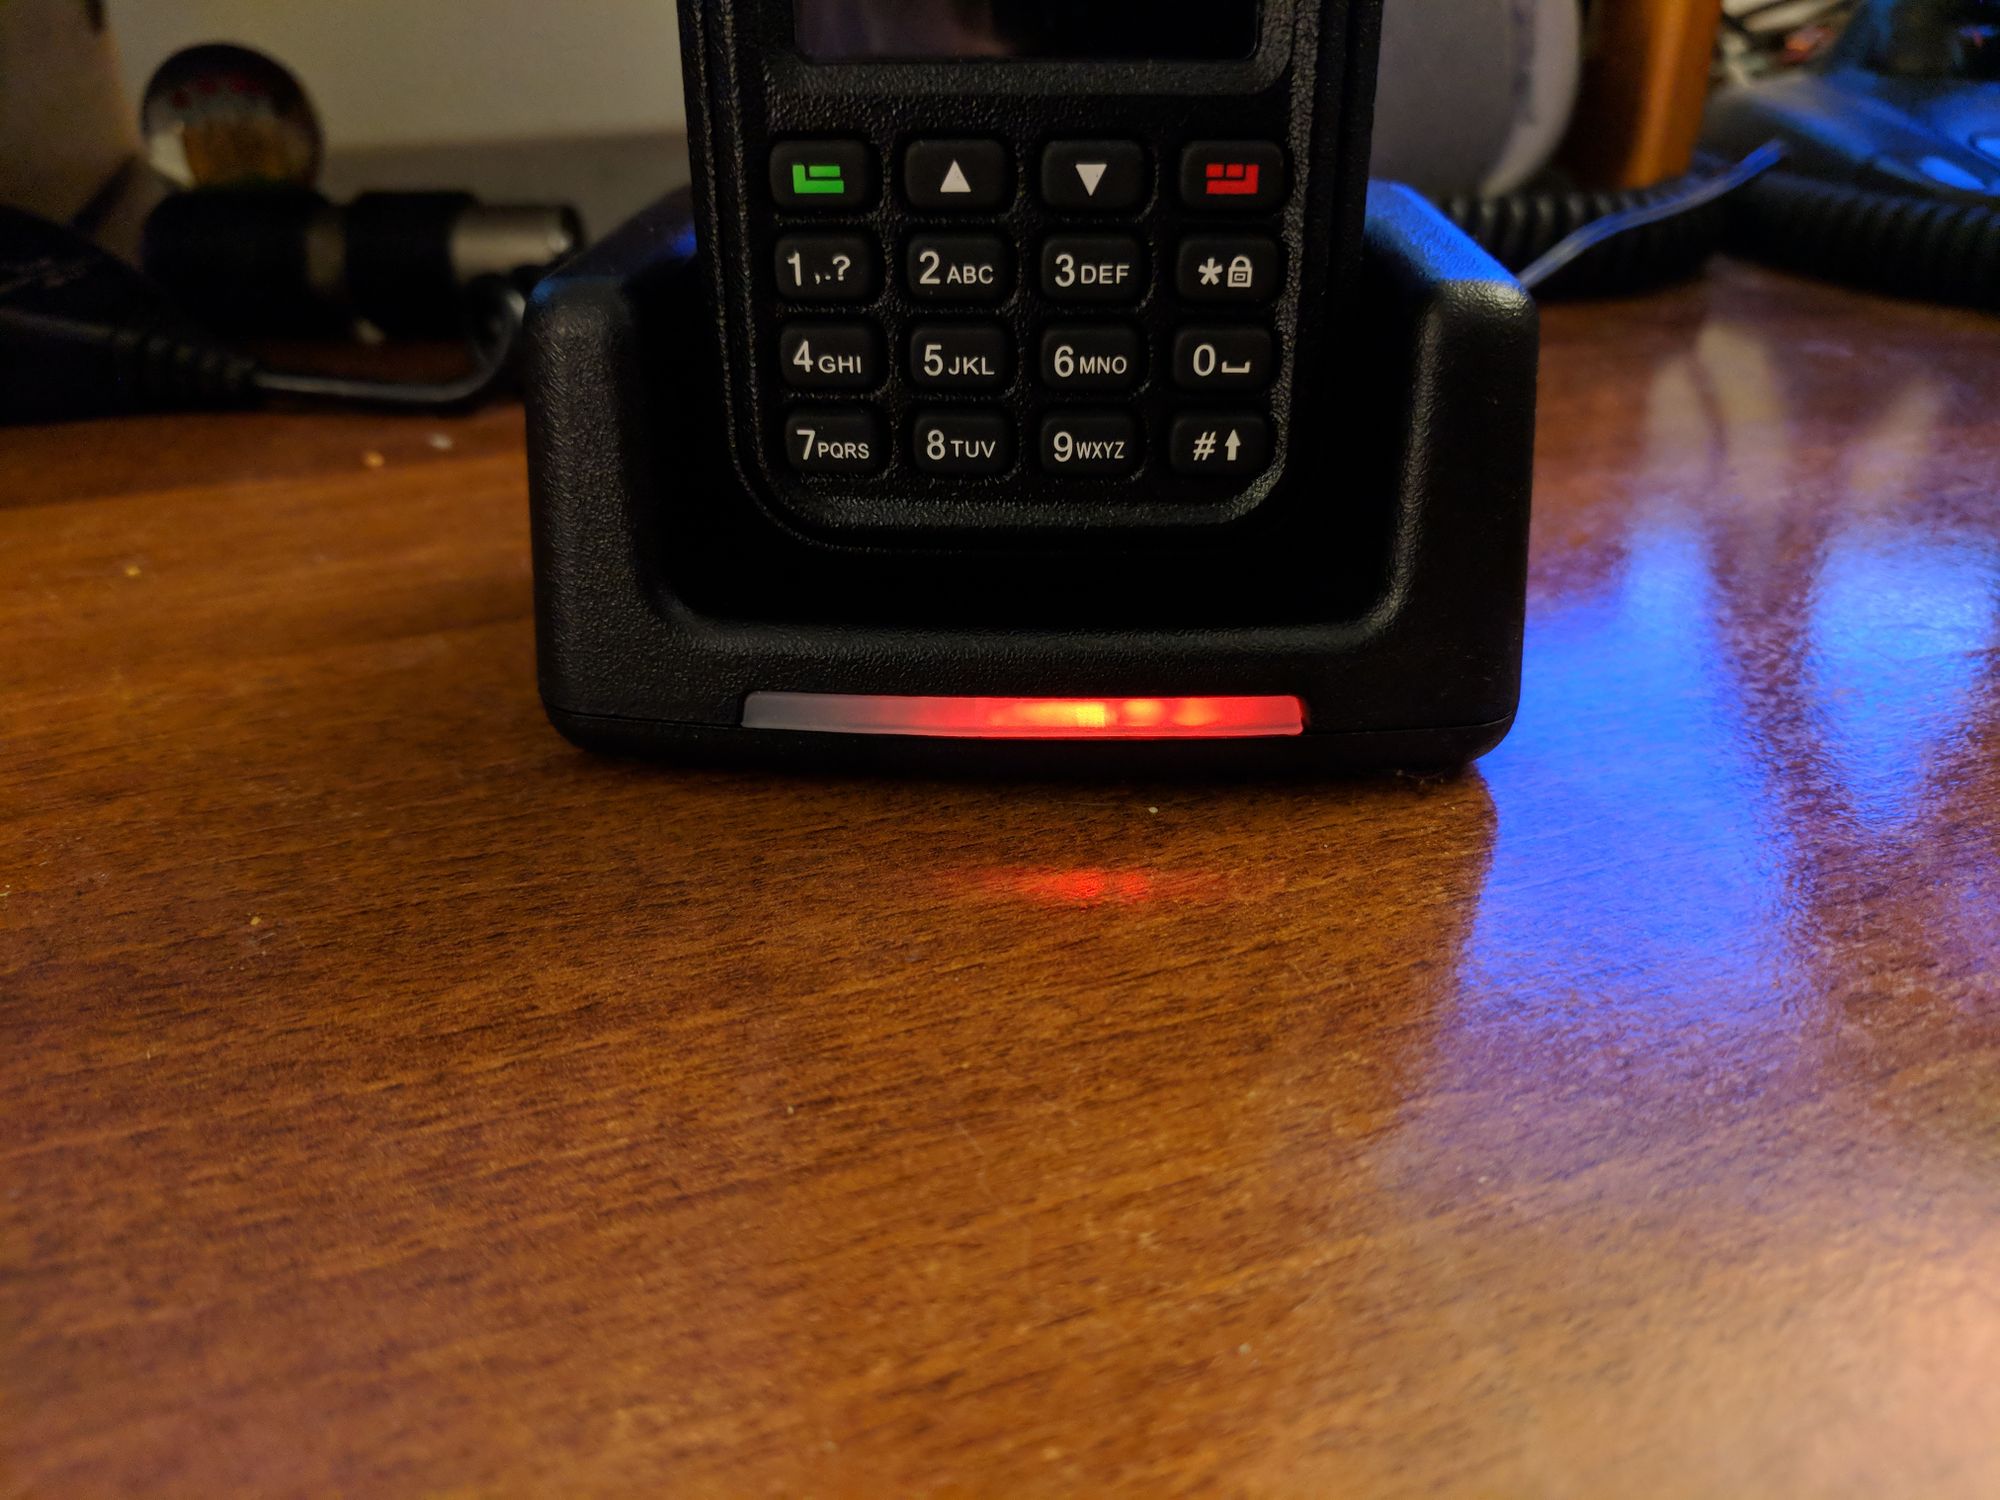
And the ultimate in shame, I installed the switch upside down. I could fix it, but I must live with my shame because I can't be bothered. But as you can see, the switch I picked has a little indicator to show it's powered and the DC input on the other side (don't freak out; this has since been replaced with wiring that isn't 20AWG or whatever this random cable I used for testing was). A little light shines through from the original power input that I could block off in various ways, but again, I can't be bothered. I believe the original charger shows green when it's not charging, the TP5100 I have it's blue, so here, the radio is actually done charging and it's just sitting idle in the base.
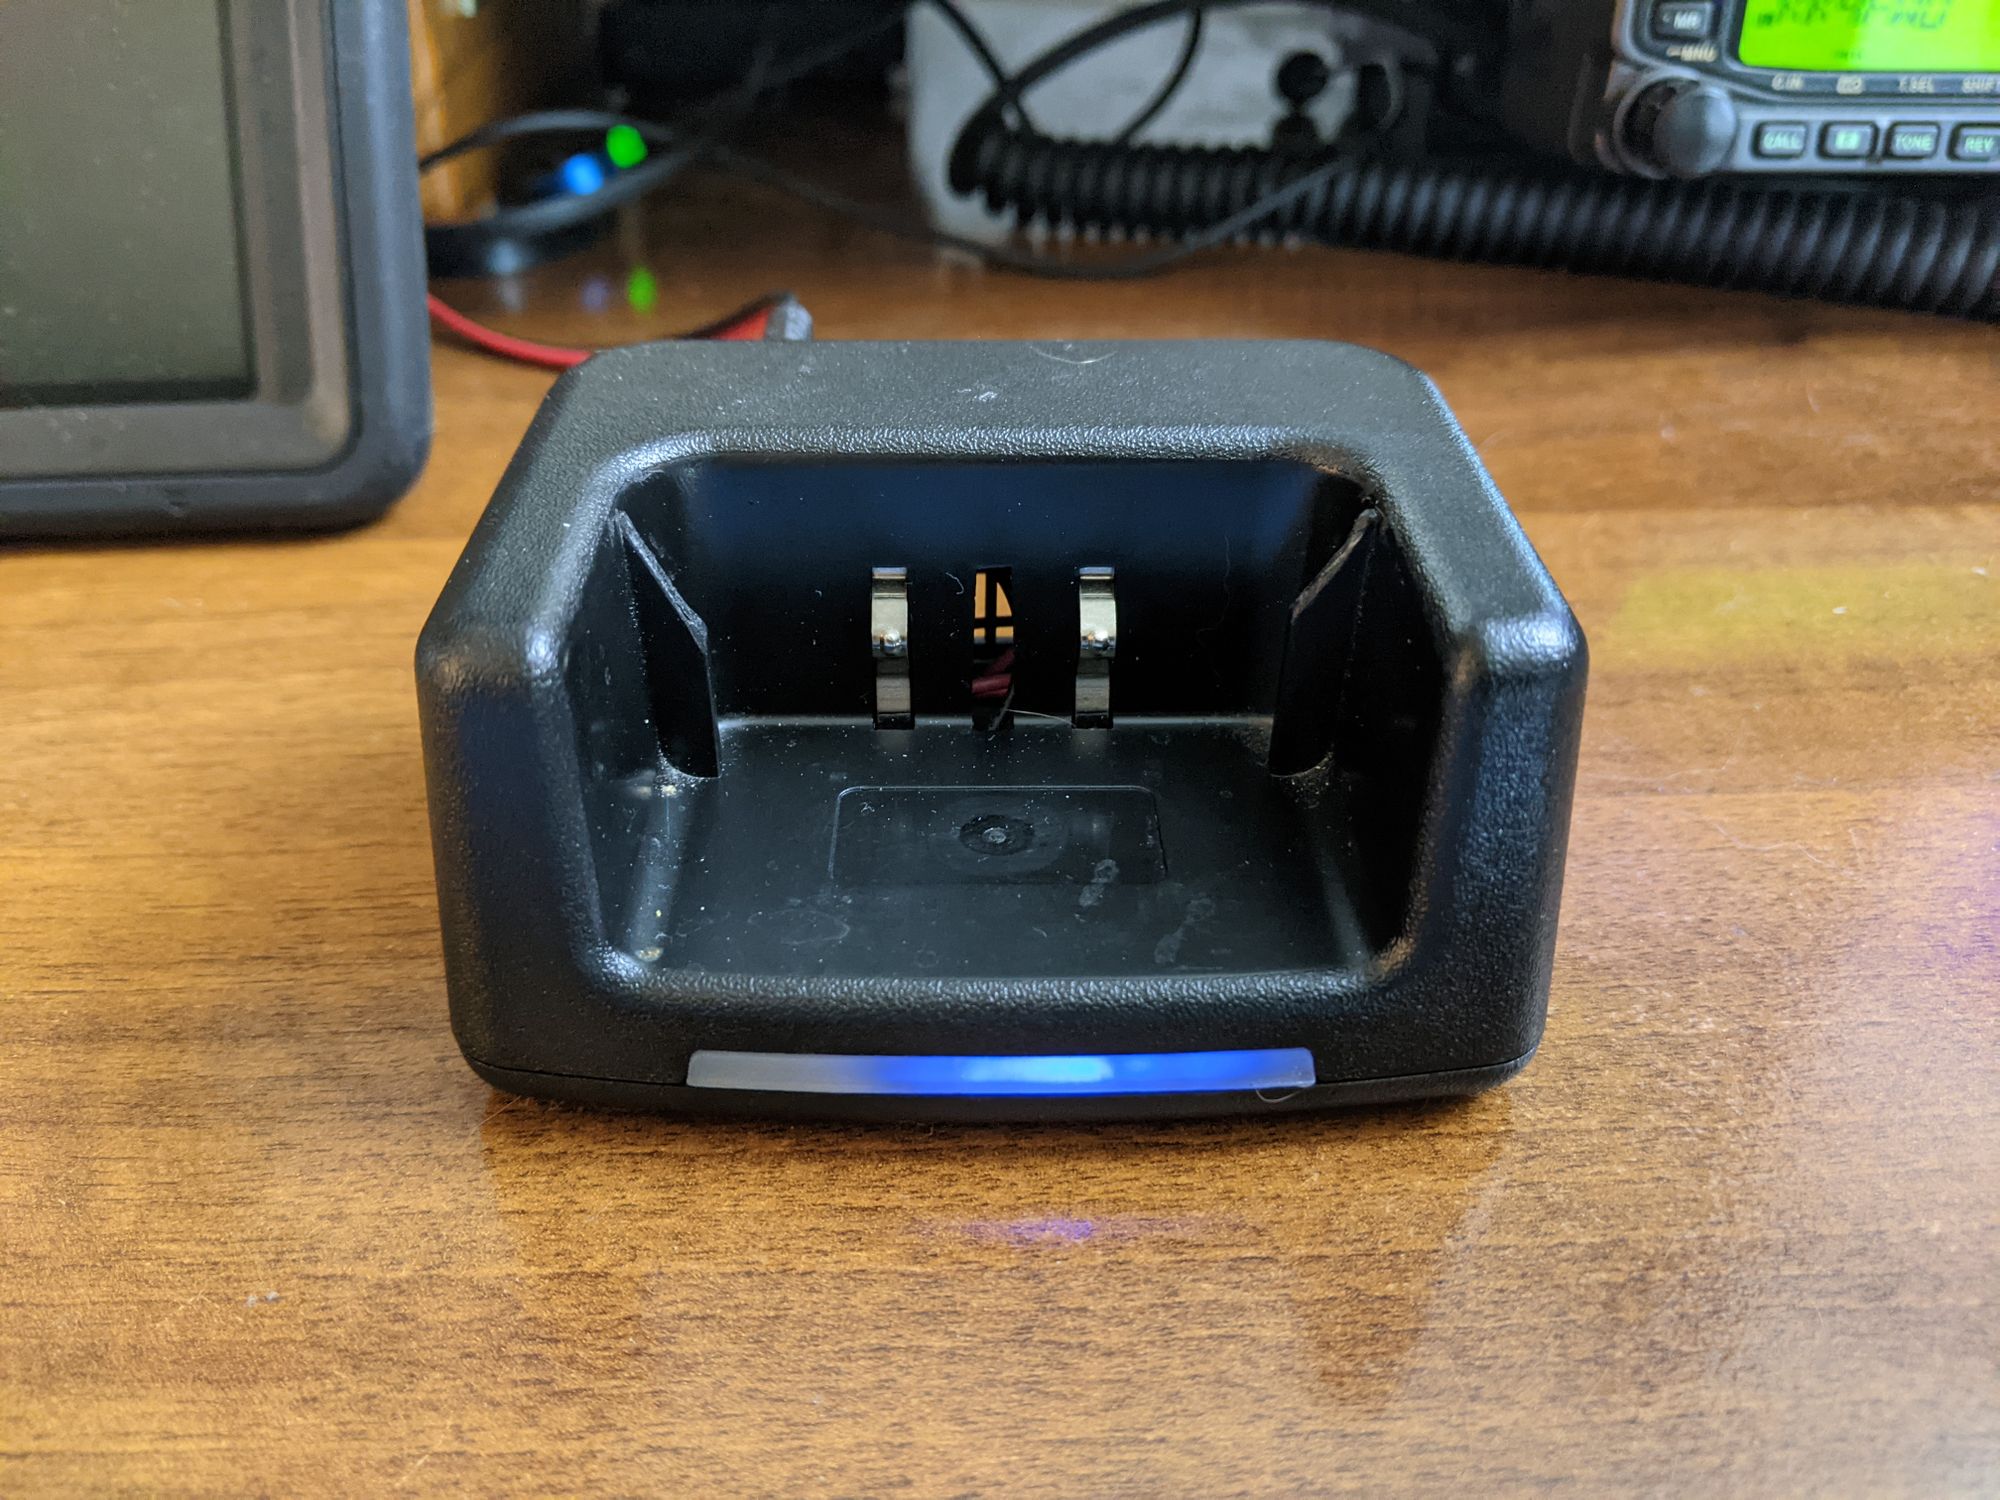
At the top of this page, you can see the charger in action, actively charging my MD380 radio. The GD77 and MD380 have almost identical battery shapes and retention tabs, so their charging base is almost identical, which was great; I could use one charger for both radios which were fine as I rarely used both at the same time and even if I need to charge both it charges plenty fast enough to pop one on the charger and swap them when done. The charge indication is in red, although there is a slight offset in the light pattern, which is most obvious in pictures. The LED on the original charger was in the middle of the board, where the TP5100 module it's off to the side, but still on the front of the module as installed.
And as I mentioned, the Anytone 868/878 battery rails are just slightly shorter than the GD77/MD380 rails, so the radio doesn't fit quite right into the charger. A very quick snip with some eBay side cutters, and it fit perfectly. I did do a slight amount of filing to round the top edge off, but it otherwise fits perfectly for all three radios.
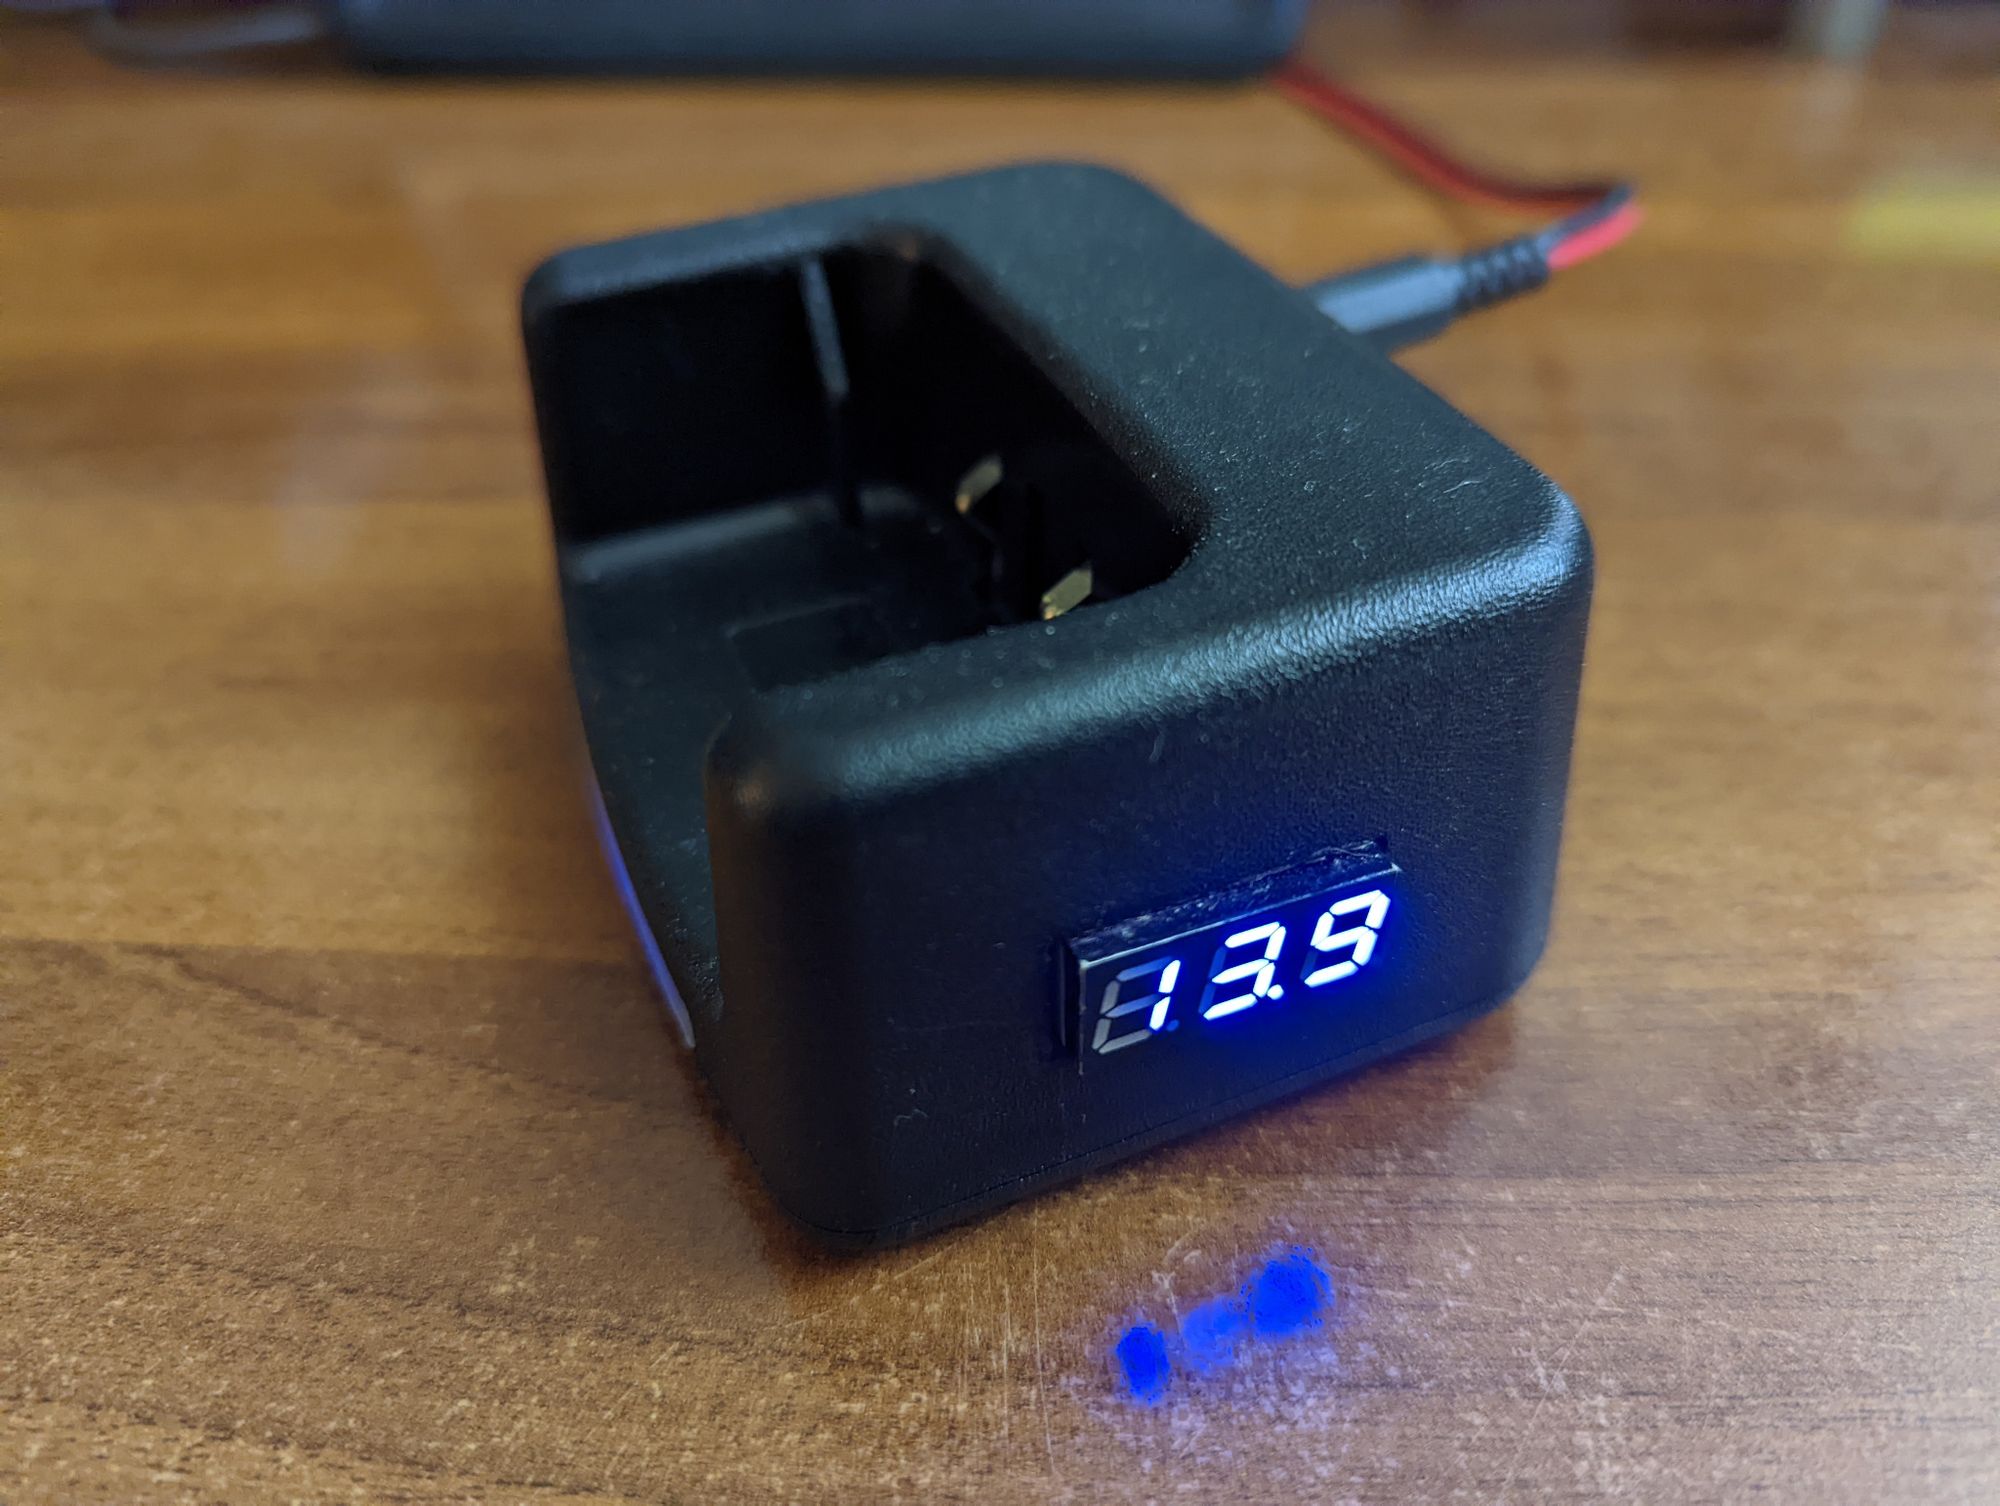
A completely optional modification I have also made is adding a very cheap two-wire voltmeter to the charging base, so I can monitor the input voltage into the charging base. The TP5100 can accept 5V all the way to 18V, so you could even use a standard USB charger to power the base, but it's handy to monitor the input voltage to see if your charging is causing any voltage droop or just simply to monitor your supply voltage. I keep my charging base connected to my bench supply, which I like to keep around 14V. What would be neat is a dual voltage (or two voltmeters) to monitor both input and output voltage; however, I always check things to make sure they are doing what they are supposed to before I use them on my radios.
If you're interested in doing this modification, here are a few things to keep in mind. First is the GD77 charger is readily available on Amazon for about $13, so if you only have one charger and somehow you run into trouble, it's not expensive to replace. If you have a GD77, MD380, and Anytone 878 like I do, you'll have three chargers, and if something goes wrong, it's not a big deal.
The TP5100 can be had from Amazon or eBay for a few bucks apiece, often sold in packs of 3 or 5 or more. Mine were all still connected to each other, and you just easily snapped one off and used it; the perforations make it pretty obvious.
I got the DC input jacks and DC power switches from Amazon as well. The packs cost a few bucks each, but I'll use them in other projects as well.
So if you have none of the above, this modification will cost you maybe $20 total in parts. And when you're done, you'll have the parts to modify other charger bases or create your own chargers; keep in mind the TP5100 can be used in a variety of ways. It can charge 1C (4.2V) or 2C (8.4V), it can charge in a variety of speeds to charge slower or faster depending on your needs/battery/application, etc. For example, I had a charger on a Bluetooth speaker fail (the USB jack just fell off into the speaker!), and I kludged in one of my TP5100s into it so the speaker was saved from going into the trash bin.